Please click HERE to be rerouted to my new site, SalvagedWhimsy.blogger.com. Sorry for the inconvenience. Thank you!!
Category Archives: Uncategorized
Happy October – A Candy Corn Treat (or Trick?)
As a candy corn connoisseur of epic proportions, I thought my husband was crazy when he told me he only ate it when it was mixed with salted peanuts. What?!?
Maybe where’s he’s from (he grew up about an hour away from where I did), candy corn is different the wonderful orange, yellow, and white confection I’m accustomed to eating.
He says it tastes like a Payday. I’ve never really been a fan….but to be honest, I’m not 100% sure I’ve tried one. I think I traded those with my sister because they didn’t have chocolate in them.
Hmmm….so, lets see if what this man (who I thought I knew) , knows what he’s talking about.
The ingredients – Candy corn and salted peanuts. (Please enjoy the close-up shot of our red countertops. Lovely, aren’t they?)

Mix equal parts together in an air-tight container (something with a lid) and mix together.
TA-DAAAH !
In a autumn-ish colored bowl for serving purposes, unless your guests find Country Crock containers to be stylish.
AND THE VERDICT….dare I admit that my husband is right…it really is good (I’m actually eating some now). Sometimes when you eat too many candy corn, it gets a little overwhelming…the nuts really cut the sweetness. I chose lightly salted peanuts, but I think it’s a personal taste thing.
So there you go…it still gives you a belly ache if you eat too much. This is the closest I’ll ever get to sharing a recipe unless anyone has any questions about how to make Mac & Cheese or PB&J.
Have you ever heard of doing this before? Maybe I’ve led a sheltered life. If you try this, please let me know what you think!
Bon appetit!
Sharing the fun at:
Piano “Mantle”
I have a huge, brick, two-sided fireplace, but for some odd reason, it doesn’t have a mantle. It also has a huge black wood burning stove in it that thrills my father-in-law to no end (he also enjoys the red countertops). I, on the other hand, don’t care how energy-efficient it is, I think it’s ugly and I can’t wait to get rid of the darn thing! For now though, it stays – mainly to stop Max, and soon Emme, from using the fireplace as an alternative passageway from one room to the next.
Anyway, back to the mantle issue….I keep seeing all of these GORGEOUS mantles in the land o’ blog and I want one! So, instead, I’m using the top of the piano that the sellers of our house left behind. (It also served as a hiding place for the snake)
It’s not very seasonal…I’ve never been much of a seasonal decorator, besides Christmas, but I thought I’d share anyway. I can’t get too crazy because of the little people who live in this house…
Ahh, there is one of them now.
The sail boat pictures were both given to me by my mom, and the black and white photo is Max’s namesake – my grandfather.
The big square vase is from Pottery Barn, and I think someone gave me the seashell potpourri in it.
I don’t remember where the metal star came from – probably ebay…I have a small collection of metal stars. If you look really, really, really close, you can see a picture of me in a bikini (pre 2-babies, pre-30s) in the beach picture.
The vase of sticks is a collection from the yard.
I kind of feel like the middle is missing something, but I haven’t found anything to put there that I like yet….any thoughts?
Linked to

Max’s Room – Almost Finished and a Sneak-Peak at Emme’s Room
MAXANDEMERSON.WORDPRESS.COM has MOVED….Please click HERE to be rerouted to this POST on my new site, SalvagedWhimsy.blogger.com. Sorry for the inconvenience. Thank you!!
Max has been sleeping in his own room for about a week now. If you’re having trouble getting your toddler to sleep alone in his or her own room, all you have to do is…..actually, I have no idea…Bryan has been sleeping with him every night. Sorry if I gave you a little glimmer of hope that you may ever be able to sleep alone with your spouse in the next decade.
I’ve actually been feeling a little bit of mommy overload lately….and am severely in need of some alone time. Even taking a 10 minute shower without Emme screaming or Max pounding on the door sounds like a day at the spa to me. Emme’s nickname since birth has been “screech owl” because when she’s mad, she doesn’t scream, holler, cry…she screeches – shrieks.
Between Emme’s screeching and my constant “no”s to Max’s death-defying stunts or attacks on his sister — I imagine the neighbors have considered putting children services on speed dial at least a couple times.
Enough venting…I know how blessed and lucky I am, it’s just been a rough couple days. On to Max’s room…if you’ll remember Part 1 of his room redo –
There’s the before picture….It’s been a while since I’ve seen those pretty curtains….oh, how I miss them.
I’ve since added a bed:
It’s all about taking baby steps. Still not a fan of the blue carpet that’s throughout most of our house…not even a little bit, and it’s going to be a while before it changes.

I bought this chest of drawers before Max was born to use as a changing table (we’re tall people). It was stained a lovely orange color…so I primed it, painted it black and then white before distressing it. I wanted to get new knobs, but I was about 9 mos pregnant, so I just used the original hardware, which I painted black and dry brushed with some white. The drawers are very temperamental, so it may be getting the boot soon.
We’re planning to add some more toy storage, and I want to get a different lamp than the one that’s on the chest. There’s no overhead lighting, so until we have that done, we are in short supply of lamps around here. I want to paint the step stool beside his bed. I’m also planning to put some pictures on the walls from our trips to the zoo…after cars, animals are a fave around here (except for Scarlet, the black pug, Max enjoys tormenting her to no end)
Now, onto a peak at Emme’s room….at this rate, she’ll be going to college before I finish it…remember, baby steps.
Here’s my original inspiration and here are some of the details I’ve almost finished:
I don’t sew…so I did this using hot glue, which I’m learning might rival duct tape for its vast number of uses. Of course, more to come on her room….I know you’ll lose sleep in anticipation of this!
take care –
Kitchen Island
I’ve been looking for a “bean and seed” counter to use as a peninsula in our kitchen when we redo it…one day. So far, all of the ones I’ve found have been a minor fortune…at least for my budget. An example of the loveliness to which I refer:

Obviously, this one is much longer than what we would need…but you get the idea. And I want to put it…
in place of this counter with the curved shelves on the end. Neat-o, huh?
All of the counters I’ve found so far cost thousands. Not.in.the.budget. So, when I was at an estate sale a couple of weeks ago, I found this…for $75 (please pardon the poor photo – it’s currently sitting on its side in my still-unpacked garage)
It was in an old barn for a long, long time, but I love the wood handles and the metal tag-holders (not sure of correct name for those) and for the most part, the paint.
I’m love the chippiness and worn away areas, but not too fond of the red spray paint. I haven’t had a chance to see if I can sand away to spray paint and get a more consistent finish. I know if I keep the chippy look, I’ll have to seal it so my daughter doesn’t eat it. If saving the current finish doesn’t work, I’m planning to just sand the whole thing and re – paint it. It needs a new top – I’m thinking butcher block….what do you think? What would you do (please don’t say, “throw it in the trash.”)?
I need some advice on this one, so any you have to offer will be greatly appreciated!
Free for (F)all Decor
Like many people, autumn has always been my favorite time of year. The colors, the smell, football, the crisp air…living in Ohio, we get the whole fall experience. I was outside with the kids this afternoon, and played around some fall-ish decor ideas from stuff I found in our yard or garage.

Very simple – just an overturned wooden box with white candles scattered on top. I think you could do 1 candle or 30….I’d just be sure to use varying heights and sit them on overturned cups (or something similar) to give more dimension beyond short and tall pillars.

Not really your typical fall arrangements, but it might inspire other ideas? What’s your favorite season and why?
Linking to

take care –
Design Style – Farmhouse vs. Cottage
Metal, wood, natural fibers, chippy paint, rust, old stuff…these are a few of my favorite things. I have always associated these items with cottage style, but today I came across a blog, LaurieAnna’s Vintage Home, that made me rethink the classification of my tastes. Described as “Simple Farmhouse Living,” a look through LaurieAnna’s blog made me think, “farmhouse…farmhouse….yes, that’s it, farmhouse!” I love it!

A display in LaurieAnna's Shoppe using an old camper she found on Craigslist. Gorgeous!

Buckets of Burlap bedroom using barn siding and a cowboy tub.

Bookshelf made from wood crates/pallets

Barn Style Bathroom from nskwood.net Rustic Cabinet as shown in Country Living

You know you're jealous...we do appreciate the sellers leaving us the matching tea kettle.I can't WAIT to tackle this badboy!
take care –
Cheerios!
I can usually squeeze a few minutes of “free” time (to load the dish washer, make bottles, pee) by giving Emme a couple Cheerios to play with after breakfast. A couple of weeks ago, I was trying to get dressed, so I gave her the Cheerios and then handed Max the box because he was acting like he wanted to look at it. Usually, he’s very good about keeping food inside its box, but he decided that Emme needed more than I had given her.
He’s such a sweet boy to help me out…
And Scarlet, the pug (black blob in lower left corner), helping me clean them up…
Hopefully, you weren’t expecting a cool cheerio craft to redeem last week’s flop. Sorry to disappoint. It was a great morning at my house, how was yours? Cheers!!
take care –
My attempt and failure at Missoni-ing…
Didn’t somebody famous once say something about the only failure is in not trying? Yeah, well, I tried, and I’d still have to call the result a failure.
So I saw these beautiful Missoni pillows on the Target website, but I’m not much of a seamstress, so I thought I’d try the same technique on an initial “S.”
There’s also one in shades of purple that I love too. Okay, so in my defense, the nearest craft store is about 40 minutes away–and craft store + toddler = chaos. It’s been a rough week because Emme’s been teething and has been getting up several times a night. My husband is on 3rd shift, so he’s basically absent….I have no idea how single moms do it!!! Back to my craft fail – if I had the opportunity to go choose my own felt colors specifically for this project, I think it would have turned out somewhat better. However, I just had a couple scrap pieces from trying to maky felt flowers a couple months ago.
So without further delay, here she is….
Max’s Big Boy Bedroom – Part 1
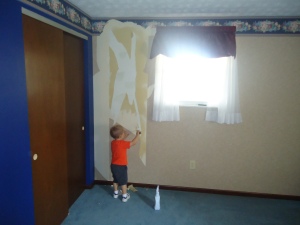
His new room is the only one in the house (THANK GOODNESS!) that has (or, had) wallpaper, and I dreaded removing it. I thought we’d surely have to re-drywall. Fortunately, the previous owners painted with semi-gloss paint before they papered, so removing it only took a day. Still, not something I want to do again in the near future. This experience has also made me rethink my plan to paper my dining room.
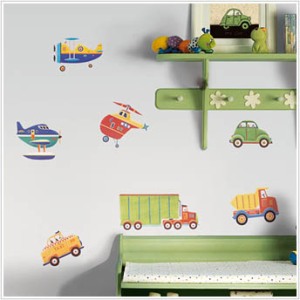
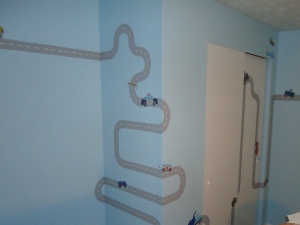
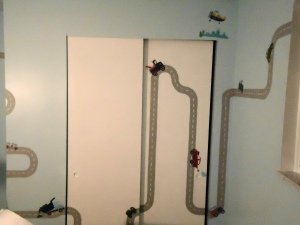
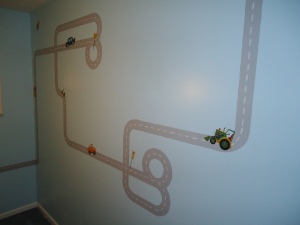
 The decal I traced is on the left, and I traced both sides of the level for the straight parts of the “road”.


